- Published on
Customise Sitecore WDP packages for Azure DevOps pipelines
- Authors

- Name
- Francisco Caicedo Narvaez
- @_Francisco_CN
Sitecore WDP Customisations
This post was made with the intention to help devs to prepare OOTB Sitecore packages to perform CI/CD activities using Azure DevOps.
The following sections describe which packages to download from Sitecore downloads, how to remove database references from packages using a Powershell script and which files need to be manually updated. Finally, how to upload modified packages into an Azure Storage container to later be used by the CI/CD pipelines in Azure DevOps.
I - Download Sitecore Packages
Sitecore packages can be downloaded from official Sitecore website. These packages need custom modifications before they can be used in the continuous delivery pipelines. The following steps were used on Sitecore 10.4 packages for Azure App Services.
Download Sitecore 10.4.0 rev. 010422 (WDP XPScaled packages).zip and unzip CM and CD packages:
- Sitecore 10.4.0 rev. 010422 (Cloud)_cm.scwdp.zip
- Sitecore 10.4.0 rev. 010422 (Cloud)_cd.scwdp.zip
- Add other Sitecore XP packages as required.
Download additional Sitecore modules
- Sitecore Experience Accelerator 10.4.0 rev. 08675.scwdp.zip
- Sitecore Experience Accelerator 10.4.0 rev. 08675 CD.scwdp.zip
- Sitecore.ManagementServices 5.2.113.scwdp.zip
- Sitecore.PowerShell.Extensions-7.0-IAR.scwdp.zip
II - Remove Database References from Sitecore Packages
Download Sitecore Azure Toolkit Download tool to remove database references from packages.
This prevents overwriting databases and generating new connection strings during continuous delivery.
Follow theses steps to remove database references from packages:
Sitecore Azure Toolkit 3.0.0was used for Sitecore 10.4.Extract the tool and follow the installation instructions from Getting Started with Sitecore Azure Toolkit.
Create source and target directories:
- Source:
C:\Work\Sitecore\wdps - Target:
C:\Work\Sitecore\wdps-nodb.
Copy Sitecore packages in source directory.
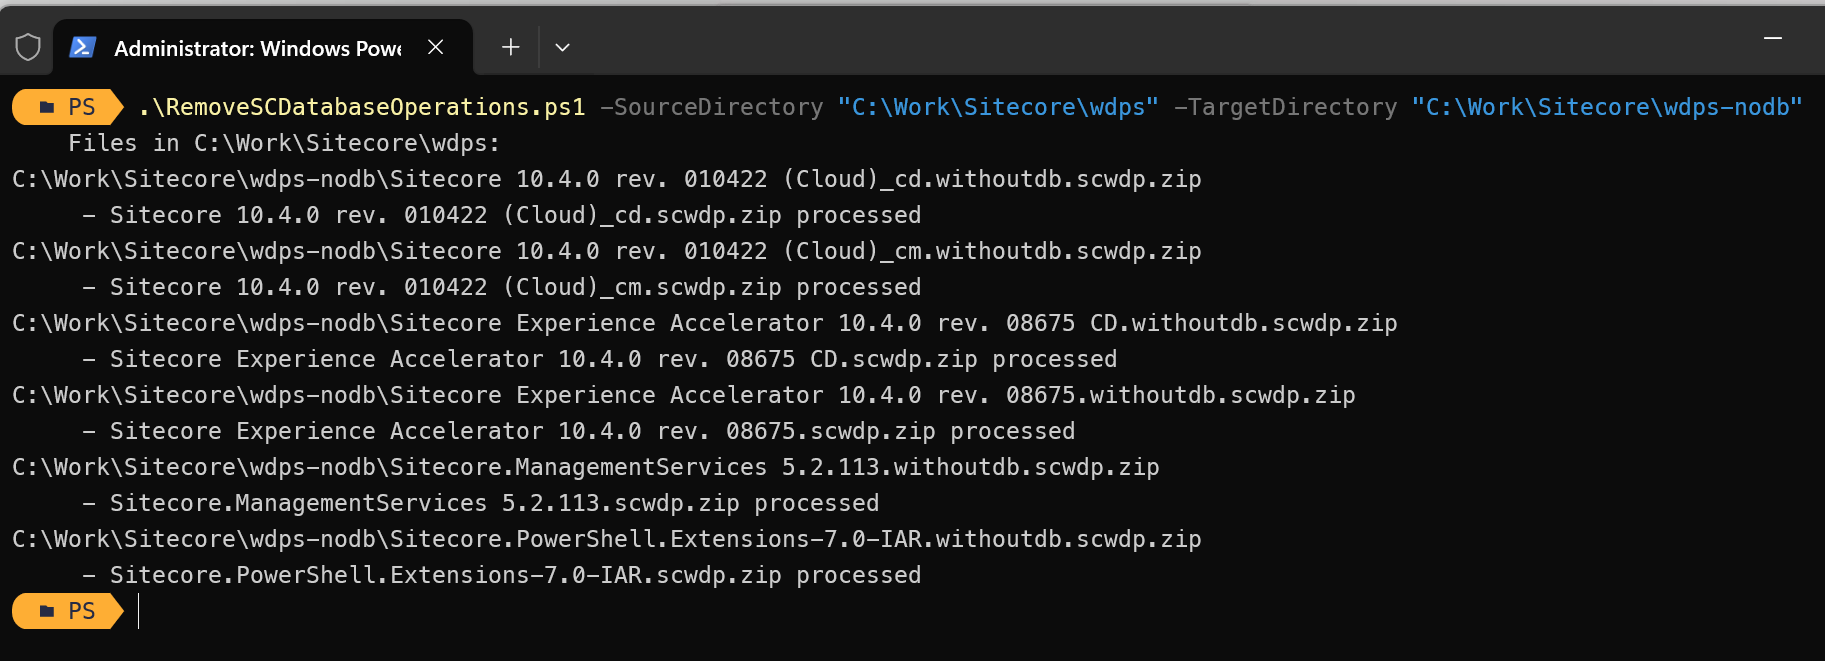
Using the Sitecore Azure Toolkit you can execute for each package the following command.
Remove-SCDatabaseOperations -Path "<your_source_path_here>\$($package.Name)" -Destination <your_target_path_here>
- Alternatively, I created the following script to process multiple packages at once.
.\RemoveSCDatabaseOperations.ps1 -SourceDirectory "C:\Work\Sitecore\wdps" -TargetDirectory "C:\Work\Sitecore\wdps-nodb"
<#
    Run this script to remove database configuration from Sitecore packages.
    Updated packages will be created containing 'whihoutdb' name on them.
#>

param(
        [Parameter(Mandatory = $true)]
        [string]$sourceDirectory,

        [Parameter(Mandatory = $true)]
        [string]$targetDirectory
    )

# Function to remove database configuration from Sitecore packages
function Update-SitecorePackages-NoDB {
    param(
        [Parameter(Mandatory = $true)]
        [string]$source,

        [Parameter(Mandatory = $true)]
        [string]$destination
    )

    $indentation = "    "

    # Loop through files in the current directory
    $files = Get-ChildItem -Path $source -File
    Write-Host "${indentation}Files in ${source}:"

    foreach ($file in $files) {
        if(Test-Path -Path "$($source)\$($file.Name)") {
            # This requires Sitecore Azure Toolkit to be installed
            Remove-SCDatabaseOperations -Path "$($source)\$($file.Name)" -Destination $destination
            Write-Host "${indentation} - $($file.Name) processed"
        } else{
            Write-Host "Error loading: $($source)\$($file.Name)"
        }
    }
}

Update-SitecorePackages-NoDB -Source $sourceDirectory -Destination $targetDirectory
III - Processing Sitecore packages
Before executing the script, run the following commands to import modules from the Sitecore Azure Toolkit.
Import-Module .\tools\Sitecore.Cloud.Cmdlets.psm1 -Verbose
Import-Module .\tools\Sitecore.Cloud.Cmdlets.dll -Verbose
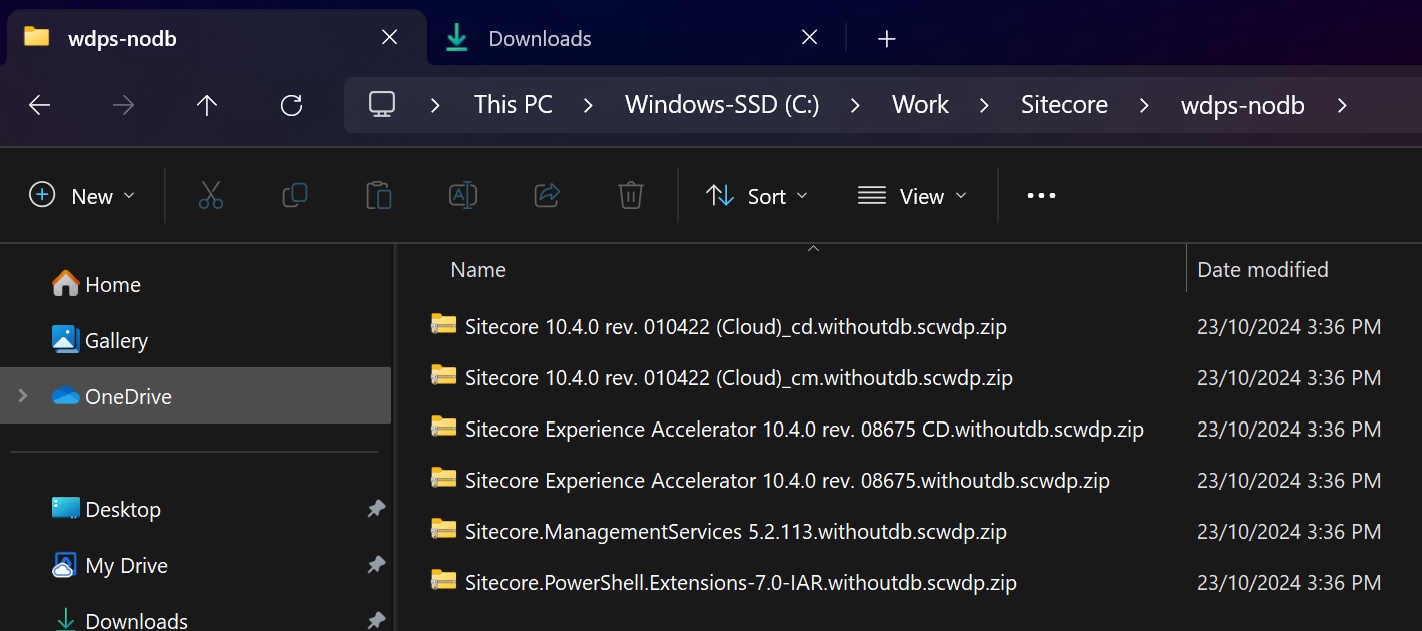
When executing the PowerShell script, the processed packages will show in the console output.
Processed packages are added in destination folder with .withoutdb. in the file name.
IV - Add required parameters to deploy Sitecore packages using Azure DevOps
Each package contains a parameters.xml file but is missing these parameters:
- Application Path
- IIS Web Application Name
Use 7-zip to open each package - right click, 7-zip, Open Archive.
Select the parameters.xml, right click and click Edit (F4).
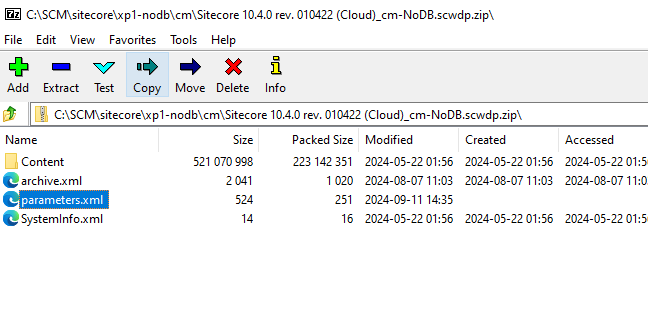
Find the License Xml parameter and remove it.
Add the following parameters at the top.
<parameters>
  <parameter name="Application Path" tags="iisapp" defaultValue="Default Web Site/Content">
    <parameterEntry type="ProviderPath" scope="iisapp" match="WebSite"/>
  </parameter>
  <parameter name="IIS Web Application Name" defaultValue="vanilla">
    <parameterEntry type="ProviderPath" scope="iisapp" match="WebSite"/>
  </parameter>
</parameters>
Save changes.
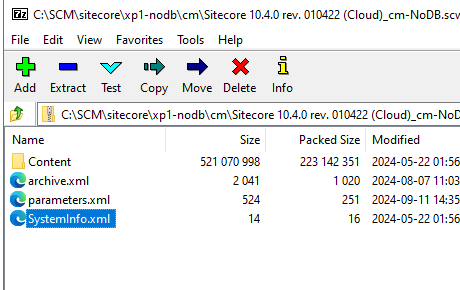
When using Azure DevOps
AzureRmWebAppDeployment@4, this task fails if cannot find systemInfo.xml file in the package. The file exists in the package, but you will notice in some instances starts with uppercaseSinstead of lowercases. Rename the file and save changes.
V - Upload customised wdps
Using Azure Storage Explorer connect to the Azure subscription and locate the storage account and container where the packages need to be uploaded.

That's it, Sitecore packages will be ready in the Azure Storage Account to be consumed by the Azure DevOps pipelines when deploying Sitecore to all the environments.